These lessons are used to introduce the student to the correct fingers to use for each of the letters of the alphabet and the numbers along the top row of the keyboard. The letters are introduced over the series of lessons in both lower case and upper case.
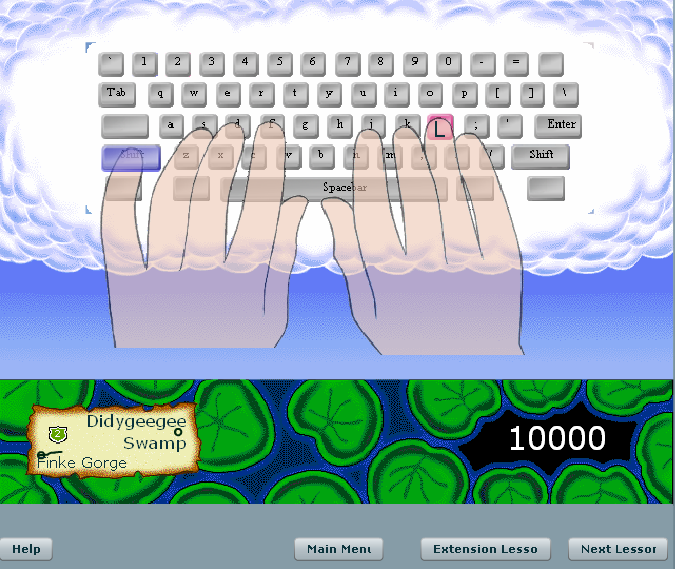
During the lessons, when a key is introduced a screen is used as below:

This screen shows how the hands and fingers are moved from the home keys to strike the correct key. If a capital letter is being introduced, you will see both hands being used. The movement is repeated a few times and you can try and copy the movement on your keyboard while the sequence is repeated.
After the sequence has been shown you are asked to practice striking the key (and usually the related home key and the space bar). A sample practice screen is shown below:

In this screen the keyboard shows which key(s) need to be struck (the coloured keys on the picture of the keyboard) and which fingers are to be used (the coloured finger(s) on the small hands).
If you strike the wrong key a message will appear in the status line. You won't be able to progress until the correct key(s) are pressed.
After the practice sequence, another screen is presented, like the one below:

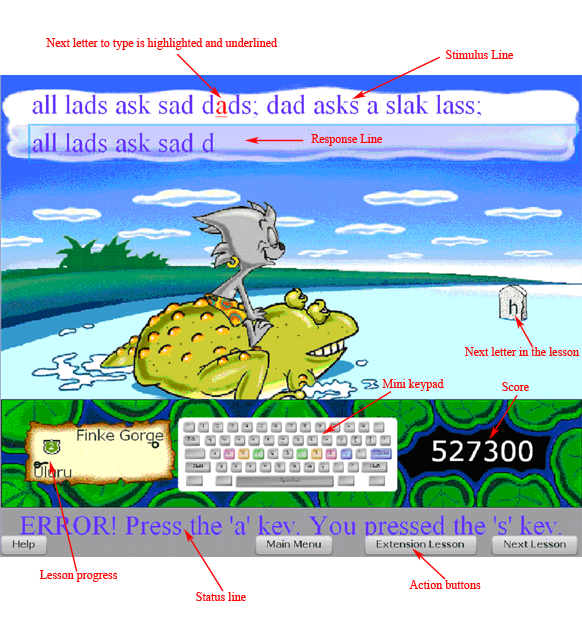
In this screen, a line of text is presented (the stimulus line) and in the line below (the response line) you should type the same letters.
NOTE: The response line needs to have the focus otherwise you won't be able to type in it. Normally the line will have the focus, but sometime using other programs will draw the focus away and you won't be able to continue the lesson until you click the mouse somewhere inside the response line to give it back the focus.
While the program is waiting for you to strike a key it blinks the required key(s) in the mini keypad.
Keys that are coloured on the mini keypad are one that have been covered so far in the course. The key colour represents the finger of the hand which is used when pressing the key.
As letters are introduced, they appear in the scene and Kewala moves toward them until it is eventually time to start practicing the new key.
The amount of lesson done is shown by the progress trail near the bottom left corner of the window.
The score accumulates as the course progresses although points are lost if the predator (such as the dingo in lesson 1) catches you during a lesson. When a predator appears, you need to type about 10% faster than you did on the line before otherwise the predator will catch you.
You can always use the "Choose Lesson" menu item on the main menu screen to revise a lesson if you want to do more practice on a group of letters.
In the early lessons some of the line of text you type are just random letter sequences. Such sequences disappear after enough letters have been learnt as it becomes easier to make real words out the available letters. However the random sequences have the advantage that they are different each time you revise a lesson and so do not become repetitive.
At the end of many lessons seemingly random words will appear. These words will be ones in which you made a mistake during the current lesson. Such are words are presented again to provide extra practice in weak areas. Of course if you make no mistakes during a lesson there won't be any weak words added to the end of the lesson.
This help window can be closed at any time without disturbing your Typequick keyboarding session.
I